Understanding the Basics of Camera Stabilizer
What is a Camera Stabilizer?
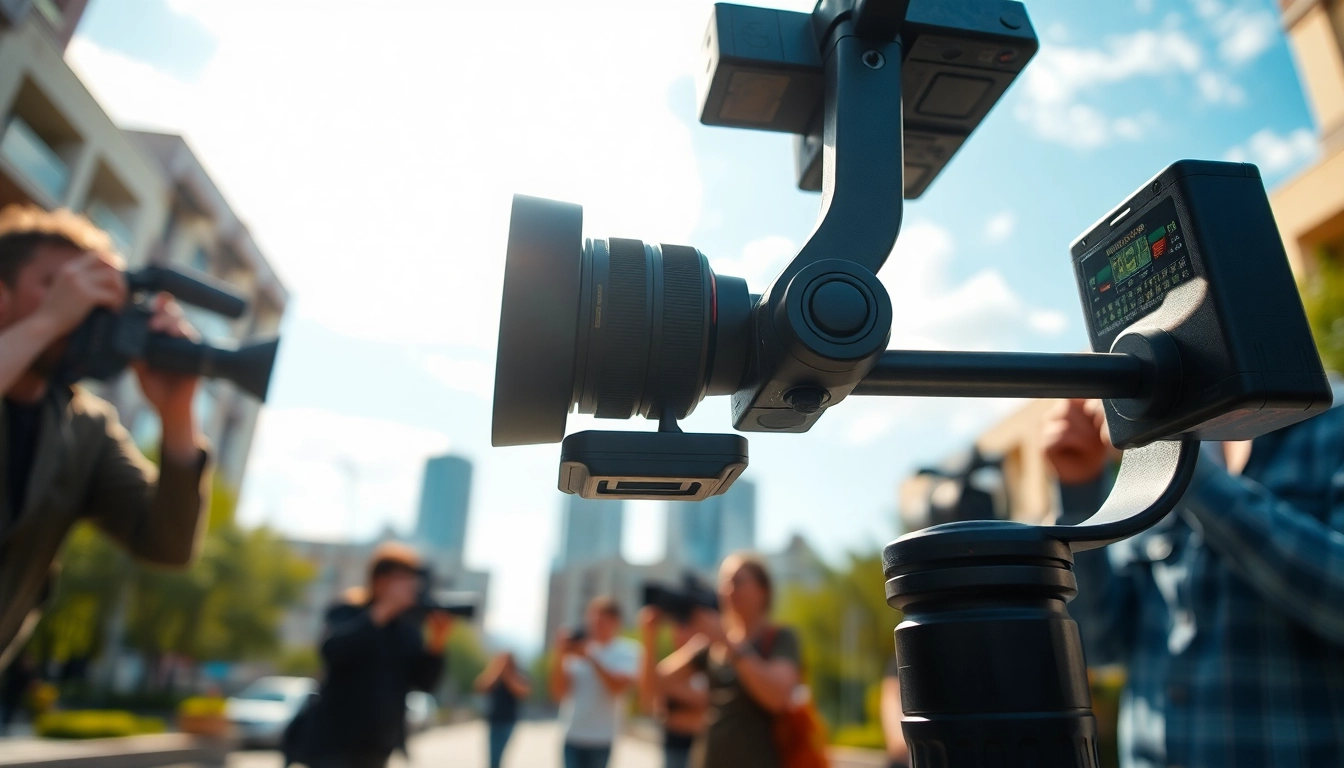
A camera stabilizer is an essential tool for videographers and photographers alike, designed to minimize the effects of unwanted camera movement, often referred to as “shakiness.” The use of a camera stabilizer ensures that footage is smooth and fluid, making it crucial for producing professional-quality videos. A primary element of this tool is its ability to maintain a steady shot during motion, allowing filmmakers to focus on creativity rather than technical difficulties.
The technology behind camera stabilizers can vary, with many modern devices utilizing complex mechanical systems or electronic gimbals that counteract physical motion. For example, a Camera Stabilizer can efficiently balance a camera using motors to adjust in real-time to natural movements.
Types of Camera Stabilizer
There are several types of camera stabilizers available, each catering to specific needs and shooting styles. Here are a few common types:
- Handheld Stabilizers: These are often lightweight, portable solutions ideal for quick setups and immediate shooting. They’re commonly used for action and documentary films.
- Gimbal Stabilizers: Gimbals utilize motors to stabilize footage across three axes—yaw, pitch, and roll—making them effective for dynamic shots. They can accommodate a variety of cameras from smartphones to DSLRs.
- Body-Mounted Stabilizers: These devices, also known as vest stabilizers, distribute the camera’s weight evenly across the operator’s body to facilitate smoother footage, especially during prolonged shoots.
- Tripod Mount Stabilizers: While tripods traditionally offer static stability, certain models include integrated stabilizers that enable motion control for unique shots.
How Camera Stabilizer Works
The function of a camera stabilizer revolves around counteracting unwanted movements through various mechanisms. At its core, it utilizes sensors, motors, and a dedicated software system to analyze the camera’s position and inertia. Here’s how it generally works:
- Detection: The stabilizer’s sensors detect the movements of the device, including tilting and shaking.
- Adjustment: Based on the sensor data, the built-in motors activate to move the camera in the opposite direction, effectively cancelling out the movement.
- Stabilization: The goal is to keep the camera balanced, ensuring shots remain steady even if the operator is moving quickly or navigating uneven terrain.
Benefits of Using a Camera Stabilizer
Smooth Footage for Professional Quality
The primary benefit of utilizing a camera stabilizer is the marked enhancement in the quality of video footage. Smooth shots eliminate distraction for viewers, which is essential for storytelling in film and video production. Audiences expect a certain level of professionalism, and any noticeable shakiness can detract from the emotional engagement of a visual narrative.
Enhancing Creative Filmmaking
A camera stabilizer opens up a world of creative possibilities. With stabilized shots, filmmakers can employ various dynamic movements, such as tracking shots and crane sweeps, without sacrificing quality. This enhances the filmmaker’s ability to convey emotion, tension, or excitement through visual storytelling. As filmmakers experiment with different angles and movements, creativity flourishes, allowing for innovative narrative techniques that captivate audiences.
Improved Control and Flexibility
Using a camera stabilizer grants operators greater control over their shots. The ability to move quickly while maintaining steadiness is crucial in fast-paced environments like live events or outdoor shoots. Furthermore, many modern stabilizers are compact and lightweight, allowing for ease of transport and setup, which is invaluable during on-location shoots. This flexibility helps filmmakers adapt to various environments and effectively capture the essence of their subject matter.
Choosing the Right Camera Stabilizer
Factors to Consider When Selecting
Choosing the right camera stabilizer requires careful consideration based on multiple factors. Here are key elements to consider:
- Type of Camera: Ensure that the stabilizer supports the camera model and weight you plan to use. Check the maximum payload capacity.
- Shooting Style: Dictate the best stabilizer for your needs. Handheld models are great for quick shots, while gimbals may be better for smooth cinematic scenes.
- Budget: Camera stabilizers range in price significantly. Establish a budget that allows for essential features without overspending.
Compatibility with Your Camera Equipment
Before purchasing, ensure the camera stabilizer’s specifications match your camera’s dimensions and weight. Compatibility is crucial not only for performance but also for attaching additional gear such as microphones and lights. Additionally, check for mounting options to select the right system that can accommodate various setups without hassle.
Budget Considerations for Camera Stabilizer
The cost of camera stabilizers can vary widely, influenced by factors such as technology, build quality, and brand reputation. Entry-level options can be found for under $100, while professional models may reach upwards of $1,000. Consider what features are non-negotiable for your production needs and look for models that offer the best value for those requirements. Always be cautious of very low-priced models that may compromise on performance or durability.
Setting Up Your Camera Stabilizer
Proper Mounting Techniques
The setup process plays a crucial role in achieving smooth and stable footage. Proper mounting techniques include ensuring the camera is centered and secure on the stabilizer to prevent any tilt or shift during use. Follow the manufacturer’s guidelines for attachment and observe best practices to ensure robust support.
Balancing Your Equipment
Initial balancing is critical to the performance of a camera stabilizer. If poorly balanced, motors may struggle to compensate for inertia, leading to footage that is less stable. To balance your setup:
- Attach the camera securely and adjust its position horizontally and vertically until the stabilizer holds it in place without support.
- Shift the camera back or forward to fine-tune the tilt balance. Adjust the side-to-side balance by moving the camera plate.
- Conduct a test run before filming to ensure that the stabilizer operates smoothly without requiring constant corrections.
Fine-tuning Settings for Optimal Performance
Many modern stabilizers come with customizable settings that allow users to maximize performance for their specific filming techniques. Adjust settings such as response speed, follow mode, and deadband to align with the aesthetic you aim to achieve. Experimenting with these features can lead to discovering unique movements and shots that enhance the storytelling aspect of your footage.
Advanced Techniques for Mastering Your Camera Stabilizer
Dynamic Movements and Angles
Once comfortable with the basics, exploring dynamic movements can significantly elevate your visual storytelling. Techniques like whip pans and object tracking can make scenes more engaging. Try incorporating dolly shots and overhead perspectives for more dynamic scenes. Practice is vital to internalizing these advanced techniques.
Using Your Stabilizer in Different Environments
Each environment presents unique challenges and opportunities for using a camera stabilizer. For instance, uneven terrain requires firmer gripping and balance adjustments, while indoor spaces might necessitate more compact movements. It’s also essential to consider lighting conditions and how they affect shooting style. Adapting to these environments with pre-planned shots can maximize the stabilizer’s effectiveness.
Common Troubleshooting Tips for Users
Even seasoned cinematographers encounter issues from time to time. Here are some common troubleshooting tips:
- Footage is Shaky: This could indicate an improper balance. Recheck your setup for weight distribution.
- Camera Drifting: Adjust the settings on the stabilizer—such as the deadband and responsiveness—to improve stabilization.
- Battery Issues: Always ensure your stabilizer is fully charged before use and carry backup batteries if filming longer.
Related Posts

Mastering Web Development: Key Skills and Best Practices for Success
Understanding the Foundations of Web Development Web development is the…

Les meilleures alternatives iptv pour une expérience de streaming exceptionnelle
Introduction aux services IPTV Dans le monde du divertissement numérique…
Enhancing Your Setup with a Starlink Mini 12v Power Supply: Benefits and Installation Guide
Introduction to Starlink Mini 12v Power Supply The starlink mini…